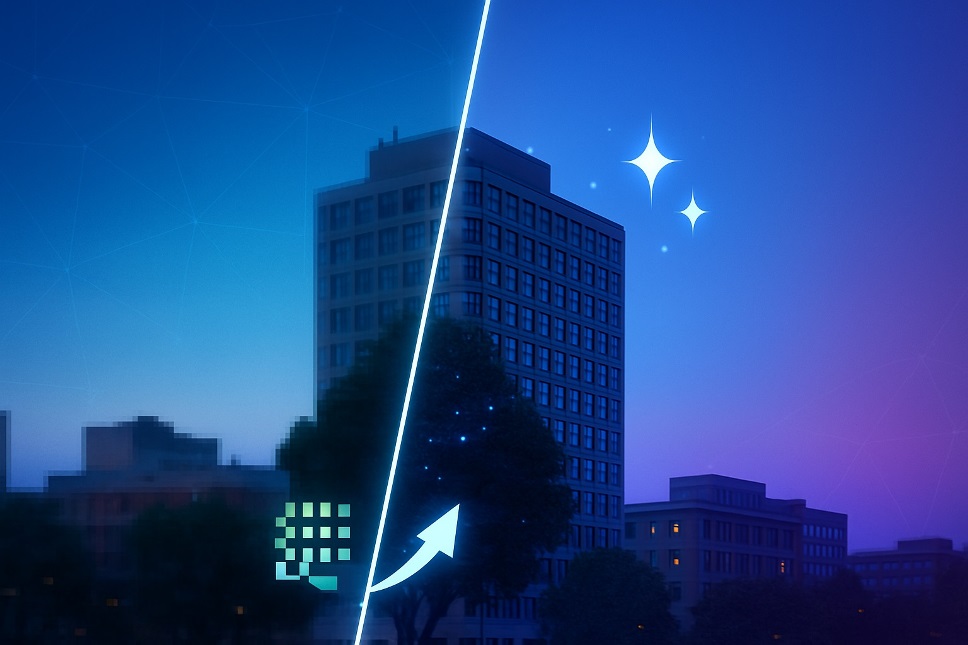
If you create for the web, sell products online, or manage social feeds, a modern image enhancer is the fastest way to turn soft, low-resolution files into crisp, publish-ready visuals. In this in-depth review, you’ll learn how these AI systems work, what to look for, and which tools deliver the most reliable results today. We also reference fresh, reputable sources and real product updates so you can choose confidently.
- What an AI image enhancer actually does
- Core capabilities that matter (and why)
- Top 5 AI image enhancers (hands-on picks)
- From basics to pro results: a clear workflow
- How today’s leaders compare (quality, speed, convenience)
- Advanced concepts without the jargon
- Use cases where AI delivers clear ROI
- Conclusion
- FAQs
What an AI image enhancer actually does
At its core, an image enhancer estimates the detail your original photo should have had, then reconstructs edges, textures, and tones. Techniques like super-resolution rebuild fine structure when you upscale, while deblurring and denoising clean artifacts from compression or motion. Recent guides explain how deep networks predict high-frequency detail rather than simply stretching pixels.
Because of these advances, an image enhancer can now function as an image upscaler for print-quality enlargements, a smart sharpener for web images, or as a restoration assistant for old family photos.
Quick takeaway: use an image enhancer when you need more detail; use editing apps for color/style—then finish with an image upscaler when you must export larger files without fuzziness.
Core capabilities that matter (and why)
- Resolution & detail: Look for models trained for portraits, products, and landscapes; some tools offer 2×–4× upscales with texture recovery. A good image upscaler should avoid halos and over-smoothing.
- Speed & batching: If you process catalogs or UGC at scale, batch workflows can save hours; Adobe’s recent Firefly update automates huge image sets in a single pass. An enterprise-ready image enhancer should handle queues without failures.
- Cross-device use: Mobile capture is the norm; Adobe’s Firefly app shows how pro-level AI editing travels with you. A flexible image enhancer works on desktop and phone alike.
Top 5 AI image enhancers (hands-on picks)
Below are five dependable options. Each mini-review explains who it’s for, what stands out, and any trade-offs—so you can match the right image enhancer to your workflow.
1. Topaz Photo AI (best for maximum quality)
Topaz consistently ranks near the top in independent roundups for restoring texture while keeping skin natural. It combines sharpening, denoise, and upscaling in one image enhancer, making it ideal for photographers who want a mostly automatic pipeline with manual overrides when needed.
2. Adobe Photoshop / Firefly (best for teams & batching)
Photoshop’s proven edits plus Firefly’s AI make a powerful image enhancer combo, and Firefly’s recent bulk features dramatically speed production—great for agencies and sellers managing thousands of SKUs. If you live in Creative Cloud, this is the most integrated path.
3. Luminar Neo (best one-click enhancement)
Luminar Neo is frequently highlighted for fast, good-looking results that suit creators who want minimal sliders. As an image enhancer, it’s strong on skies, portraits, and overall pop—ideal for social feeds and quick client previews without deep retouching.
4. Pixelbin (best for product catalogs & developers)
Pixelbin focuses on workflow and scale. As an image enhancer and image upscaler, it offers robust cloud integration for e-commerce teams that need consistent quality across thousands of product images with API-friendly deployment.
5. Deep-Image.ai (best for simple web-based upgrades)
If you prefer a browser-first approach, Deep-Image.ai provides straightforward tools to upscale, denoise, and clean artifacts. It’s a fast way to run an image enhancer without installing heavy software—useful for freelancers hopping devices.
From basics to pro results: a clear workflow
- Diagnose the problem. Is it blur, noise, or small size? Choose the image enhancer mode accordingly (sharpen, denoise, or upscale).
- Upscale correctly. Many tools safely hit 2×–4×; for web banners you can push more, but watch for plastic textures. getimg’s tutorial is a good reference point for 4× use. Pair your image upscaler with a light sharpen to avoid halos.
- Preserve faces and text. Portrait-aware models can enhance photo realism and avoid waxy skin; product-aware models keep edges crisp.
- Export for the destination. For marketplaces, prioritize clean edges and compression efficiency; for print, aim for 300 DPI after you enhance image and resize.
- Automate when you can. If you repeat steps daily, batch queues or API-based runs will scale your image enhancer output for consistent catalogs.
How today’s leaders compare (quality, speed, convenience)
Independent roundups repeatedly place Luminar Neo, Photoshop/Lightroom, Topaz Photo AI, and others among the best performers. If you need a single-app solution, Luminar and Topaz are safe bets; if you need collaboration and bulk operations, Adobe remains the default. Pixelbin and Deep-Image.ai shine when you prefer cloud simplicity or developer-friendly pipelines.
Also Read: Ultimate Gimkit Host Guide 2025
Advanced concepts without the jargon
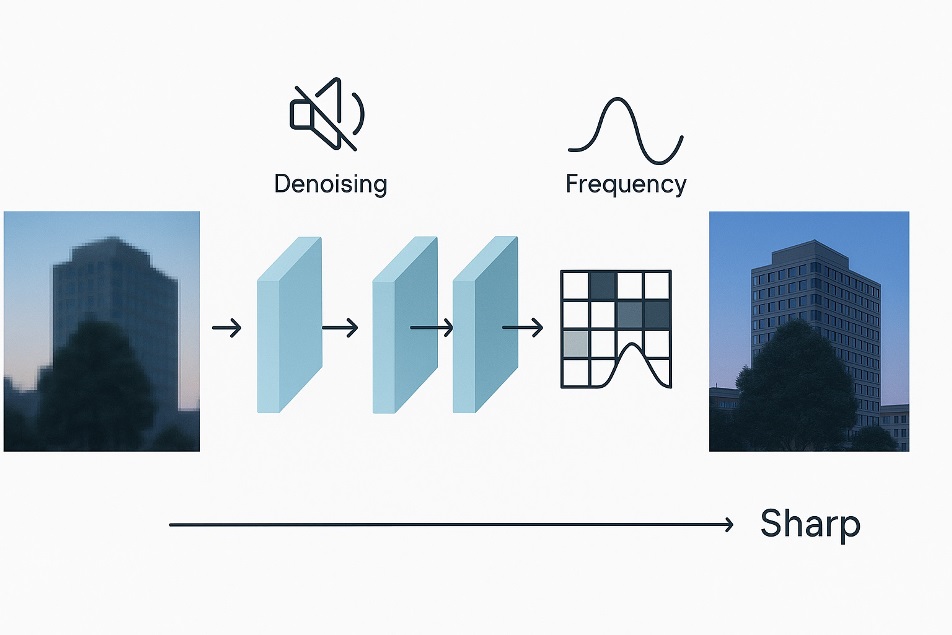
Deep learning image enhancer models don’t “invent” random detail; they learn patterns from vast image datasets and predict high-frequency structure that would plausibly exist at a higher resolution. That’s why a good image upscaler can bring back hair strands or fabric weave while suppressing noise. Modern literature calls this enhance image quality via learned priors—an approach far beyond old bicubic resizing.
Use cases where AI delivers clear ROI
- E-commerce: Better thumbnails and zoom-ins reduce returns and increase conversion.
- Content & social: Faster prep means more posts from the same shoot; a mobile-ready image enhancer lets you fix assets on the go.
- Archives & restoration: Old scans benefit when you enhance photo clarity carefully, especially for print keepsakes.
- Design & marketing ops: Teams with heavy volumes love batch runs; the best stack marries a studio editor with a scripted image enhancer pass.
Conclusion
If you’re a solo creator who wants fast wins with minimal setup, pick Luminar Neo or Deep-Image.ai as your everyday image enhancer. If ultimate quality is your priority, Topaz Photo AI remains a favorite among photographers. For agencies and stores that must move at scale, Adobe’s Photoshop + Firefly is the most future-proof stack right now. Teams needing cloud pipelines should consider Pixelbin. With the right image enhancer, you’ll enhance image detail, elevate brand perception, and ship visuals that look like they were captured with better gear—without reshooting.
FAQs
1) What file types work best with an image enhancer?
Most tools accept JPG and PNG; for the cleanest results, start from the highest-quality source file available and let the image enhancer run before heavy color grading.
2) Does an image upscaler change colors or only resolution?
Primarily resolution and detail—color changes are minimal unless you apply extra filters. Run an image upscaler first, then do stylistic edits.
3) How do I avoid over-sharpened, plastic-looking output?
Use modest settings, preview faces at 100%, and prefer models tuned to enhance image quality without aggressive smoothing.
4) Can these tools fix motion blur from a slow shutter?
They can often reduce it, but extreme blur is hard to recover. Start with a targeted sharpen model inside your image enhancer and test small increments.
5) What’s the best workflow for social posts vs. prints?
For social, a quick image enhancer pass plus resize is enough. For prints, upscale with an image upscaler to target dimensions, then export at print DPI.


